Lazy J Bar C

Lazy J Bar C

Wednesday, August 31, 2011

Pear Apple Pie

All of our fruit trees are self-pollinating dwarf varieties and the peach tree is REALLY dwarf at about 4 foot tall and 4 foot wide.

Walnut, Pear, Plum, Peach

Last year, we had winter rains and more fruit than we knew what to do with. This year, we had NO winter rains and consequently there was nothing for the wildlife to eat. The trees all bloomed nicely, were setting a decent amount of fruit and we had all of them covered completely with bird netting. The first to bear each year is the Santa Rosa plum tree. It had about 40-50 nice plums that I was preparing to harvest in a couple of days because they were almost ripe. The next morning, most of them were gone; the day after that, the rest were gone. Next, the peach tree would be ready to harvest. Something ate the peaches, still green, right down to the pits while still on the branches; didn't get one. Finally, the Kieffer pear tree ripens. Most got pecked and eaten in spite of the bird netting but I was able to pick THREE pears and they were big! Woo-Hoo!! Oh well, glad I wasn't trying to feed my family from the fruit tree harvest this year. Like I've said before, the critters must have needed it more than we did because of the dry winter.

I DID get to make a Pear Apple Pie with a Streusel topping yesterday! :) The three pears yielded almost six cups of fruit so I only had to add a couple of apples. The apples came from my friend's tree.

Filling
Thinly sliced, peeled pears and apples to equal 8 cups
1/2 to 2/3 cup sugar, depending on the sweetness of your fruit
2 tablespoons all-purpose flour
1 teaspoon Apple Pie spice
Pastry for a Single-Crust pie

Streusel Topping
1/3 cup all-purpose flour
1/2 cup old-fashioned oats
1/2 cup brown sugar
1/2 teaspoon Apple Pie spice
1/4 cup butter

Preheat oven to 375 degrees. Line a 9-inch pie plate with the pastry. In a large bowl, combine all filling ingredients and mix well, let stand about 10 minutes to develop juices. Pour filling ingredients into pastry lined pie plate. In a separate bowl, combine flour, oats, sugar and Apple Pie spice; cut in butter until crumbly. Sprinkle over the top of the pie.


To prevent overbrowning, cover the edge of the pie with strips of foil or use a pie crust shield. I bought a set of these several years ago and they make life so much easier!!


Bake for 25 minutes then remove shield and bake for another 20 to 25 minutes until the top is golden brown and the fruit tests done when pierced with a knife.


I was really pleased that I got to use the pears for such a yummy pie! :)


Monday, August 29, 2011

Oatmeal Wheat Bread

Some days, I truly feel like I'm living a dream come true! I have my dairy goats, my chickens and my garden and fruit trees. I have a wonderful husband who indulges me in all these things! :) I have my own "business" baking for the Farmer's Market from HOME!! Since I'm at home, I get to go down and feed the chickens their garden/kitchen scraps around 9:30 or 10:00. I'm able to tend to the garden more than if I was away all day. Today, I've got some beans soaking for dinner tonight that we will have with some chicken with some homemade salsa fresca made using ingredients from the garden, guacamole and tortillas. So far, I have six of today's eight scheduled loaves of bread finished, the last two are in the bread machines. I'm even getting to work on crocheting some new dishcloths and potholders! Don't get me wrong, I also have days when I'm TOTALLY exhausted by the end of the day and thinking it would be a good idea to move back to the city! LOL!! I'm sure all you Farmgirls out there can relate! ;)

Anyway, this is my favorite sandwich bread of all the ones I make. I have been making regular Oatmeal Bread (recipe from the back of the King Arthur Flour Bread Flour bag) for a couple of years and thought I would try it with half whole-wheat and half bread flour, I like it even better than the original! The whole-wheat flour gives it kind of a nutty taste. Hope you get to give it a try soon!

1 1/2 cups bread flour
1 1/2 cups whole-wheat flour
1 cup old-fashioned rolled oats
1 1/2 teaspoons salt
1 cup lukewarm milk
2 tablespoons butter
3 tablespoon honey
2 teaspoons bread machine yeast OR 1 packet active dry yeast (If using active dry yeast, dissolve it in the warm milk before combining with the remaining ingredients.)

Mix, knead and let your dough rise until doubled using your favorite method; bread machine, manual or stand mixer. Shape dough into a loaf, put it in a greased pan, cover and let rise in a warm place until nearly doubled. Bake in a preheated 375 degree oven for 30 minutes, cover loosely with foil after 10 minutes.

Sunday, August 28, 2011

I Don't Like Spiders And....

Great BIG grasshoppers in my garden!! These guys are called Mexican Generals around here because of their bright coloring, their wings are red. This one is about 3 inches long.

Hiding in the zucchini.


Now for the spiders....

Hanging out between the goat pen and the horse corral.


Little Joe thought he wanted to chase this one!

Thursday, August 25, 2011

Slow Cooker Applesauce

I made applesauce for the first time last year. Yeah, I know, it's SOOO easy what was I waiting for! LOL!! One of the vendors at the Farmer's Market has the most amazing apples every year and I use his apples for applesauce and apple butter, which I also make in the slow cooker! :) I like the fact that you don't have to keep stirring and stirring to prevent sticking and burning like when you cook it on the stovetop. For cinnamon applesauce, tuck a 4 to 6-inch cinnamon stick in with the apples while they cook; remove the cinnamon stick before mashing the apples.


Fill the slow cooker with peeled, cored and quartered apples. Toss with 2 to 3 tablespoons of lemon juice. If the apples seem dry, add a tablespoon or two of water.


Cook on low for 4 to 6 hours until the apples are extremely tender and falling apart. My slow cooker has a "hot spot" so I had to stir the apples part way through. These were done in 4 hours.


Add some sugar to taste, I used about 1/4 cup of sugar this time.


Use a potato masher to mash the apples as fine as you like them.


My slow cooker full of apples yielded 2 pints plus a little over a cup, which Jerry's mom ate warm! :) I put the pints in the freezer after they had cooled down in the fridge but you could also can the hot applesauce following the directions in the Ball Blue Book.

Tuesday, August 23, 2011

Peach Cobbler Muffins

Here is another recipe using my Baking Mix and fresh peaches. With the brown sugar/walnut topping and the little bit of almond extract, these really do taste like peach cobbler! :)

2 cups Baking Mix
1 cup sugar
1 1/2 teaspoons Apple Pie spice
1/2 cup chopped walnuts
1 cup peeled, diced fresh peaches (one large peach)
1 egg, beaten
1/4 cup butter, melted
1/2 cup milk
1 teaspoon vanilla
1/4 teaspoon almond extract

Preheat oven to 375 degrees.
In a large bowl, combine baking mix, sugar, Apple Pie spice and walnuts. In a separate bowl, combine egg, butter, milk, vanilla and almond extract. Add to dry ingredients and stir just until dry ingredients are moistened; stir in peaches.

Divide batter between 18 greased muffin tins (or use paper liners). I obviously made jumbo muffins! LOL! Sprinkle tops with some brown sugar and chopped walnuts. I didn't give an amount because, to me, recipes NEVER call for enough topping! :)


Bake for about 20 minutes or until muffins test done. Let cool slightly, then remove from pan and cool completely on a wire rack.


I took some of these to sell at the Farmer's Market last Saturday and they were a big hit!

Linking to the Farmgirl Friday Blog Hop at Deborah Jean's Dandelion House.

Sunday, August 21, 2011

Jerry, Paco and Buddy Go On A Photo Shoot

Last week, Jerry rode Paco out into the cow pasture next to us and took Buddy with him. He ALWAYS has to take Buddy, he isn't gonna miss an opportunity to go for a walk! :) I had them take the camera along to see if they could get some photos for me, here are their offerings for your Sunday viewing pleasure!!

With all the rain, there is plenty of feed for the cattle.

The tank has water too. (It actually has more water right now!)

Looking north toward the Rincon mountains.

The greasewood is blooming, this is the smell of the desert when it rains!

Pretty huh? Too bad it's puncture vine!

The barrel cactus have started blooming.

The windmill on the hill. We can see this from our front windows.

Buddy romping through the poppies! Hmmm...I feel a line from the
 Wizard Of Oz coming on!

We sure do have some nice vistas here in the high desert! :)


Friday, August 19, 2011

Health Grain Bread

This bread is chock full of good-for-you stuff like raisins, carrots, sunflower seeds and wheat germ. The sunflower seeds and raisins give it a salty/sweet taste that is really yummy! This looks like a lot of ingredients for just a loaf of bread but it is worth it! :) You could make a single 9 x 5-inch loaf but sometimes you might want to share a loaf of bread with someone. I make these half loaves of some of my specialty breads for the Farmers Market because some of the older customers just don't want a full-sized loaf. I got the idea from the King Arthur Flour website a couple of years ago, they call them "Sharing Loaves." I make the Sharing Loaves with this recipe.

1 to 1 1/4 cups milk
2 1/3 cups bread flour
1 1/3 cups whole-wheat flour
1 tablespoon honey
2 tablespoons olive oil (I use the extra light)
1/2 cup raisins
1/2 cup sunflower seeds
1/2 cup grated carrot
1/4 cup oat bran
2 tablespoons wheat germ
1 tablespoon cracked wheat
1 1/2 teaspoons salt
2 teaspoons bread machine yeast OR 1 packet active dry yeast (If using active dry yeast, dissolve it in the warm milk before combining with the remaining ingredients.)


Mix, knead and let your dough rise until doubled using your favorite method; bread machine, manual or stand mixer. Divide dough in half and shape each half into a smooth ball. Place side by side in a greased 9 x 5-inch loaf pan. Let rise in a warm place until nearly doubled in size.


Bake in a preheated 375 degree oven for 30 to 35 minutes until golden brown; cover loosely with foil after 10 minutes. Remove to a wire rack and cool completely.


When completely cool, carefully separate the two loaves; if necessary, use a serrated bread knife to help separate them. Don't forget to share one loaf with a friend! :)

Linking to the Farmgirl Friday Blog Hop at Deborah Jean's Dandelion House!

Thursday, August 18, 2011

And The Winner Is.....

There were 18 entries for the seasoning blends giveaway which included three ladies from the MaryJanesFarm chat room who were unable to leave a comment on the blog. I want to thank all of you for participating! This was fun! :)

I wrote everyone's name on a slip of paper and put them all into a bowl.


Mixed them up REAL good.....closed my eyes.....drew one.....and the winner is.....


Melody!!! Congratulations! Please email me at calicocandy@dishmail.net with your address and I will get the package in the mail tomorrow. Thanks again to everyone who entered! :) 

Wednesday, August 17, 2011

Sausage Gravy and Biscuits - For Supper

Ever have one of those days where by the end of the day you are so tired you just want some comfort food? Well, I had one yesterday and decided we would have biscuits and gravy for supper.


Brown sausage in a large pan. We like the hot breakfast sausage. To make gravy, you need one tablespoon of fat and one tablespoon of flour for every half cup of milk that you plan to use, don't be afraid to add some butter if there isn't enough grease from the sausage. This ratio makes for a nice, thick gravy! :) I used half a pound of sausage, 4 tablespoons drippings/butter, 4 tablespoons flour and 2 cups of milk.


Add flour all at once.


Cook and stir for a couple of minutes to brown the flour and so that the gravy doesn't taste like flour.


Add the milk all at once.


Cook, stirring constantly, until thick and bubbly. Season with salt and pepper if needed.


I served this over some Buttermilk Biscuits made with my Baking Mix and added some scrambled eggs on the side. I felt much better after dinner! :)

Monday, August 15, 2011

Tomato Sandwich

I FINALLY picked the first full-size tomatoes from the garden today!! I have four different kinds of larger tomatoes and the first ones ready are the Rutgers. I have never grown these before and I am very happy with how they have done. I started all my tomatoes, eggplant and peppers from seeds this past winter. Hurray for Baker Creek seeds! Anyway, this tomato was just begging to be made into a sandwich! :)


I got a slice of homemade oatmeal bread, slathered on some homemade mayo, added some salt and Seasoned Pepper and called it good! Check the dark red color of this baby!


Some of my homegrown sprouts would have been good too but I don't have any at the moment. The flavor of this Rutger tomato was everything we have always heard a homegrown tomato should be! I know, kinda silly to get so excited about a tomato, but it sure was good!! :)


Sunday, August 14, 2011

Seasoning Blends Giveaway!

To celebrate absolutely nothing, I have decided to give away a nice selection of my gourmet seasoning blends! :) Actually, since I can sell bread again at the Farmers Market, I won't be selling these, I have plenty to use up myself, and I would like them to go to someone who would use them and appreciate them. None of my family or friends is that into cooking! LOL!! The box contains one each: Indian Seasoning, Chinese Seasoning, Lemon Pepper, Salt-Free Herb Seasoning, House Seasoning, Cajun Seasoning, Seasoned Salt and Seasoned Pepper. To enter, simply leave a comment on my blog and I will randomly draw a winner on Thursday, August 18, 2011. Good luck and happy cooking!

Friday, August 12, 2011

Pizza!

Living out here in the country, we don't get pizza delivery and since the bridge over the interstate is being rebuilt after a big accident on March 15th, it is an extra 10 miles to get to town! However, a girl still needs pizza and beer on Friday night occasionally! I realize this is a pretty boring pizza recipe to be posting in Blogger-Land but if it just inspires you to make your own that is good! The dough recipe is from the "Not Your Mother's Slow Cooker Cookbook" and makes two 14-inch thin crust pizzas or one deep-dish crust.

1 cup water
1/4 cup extra-virgin olive oil
3 1/2 to 4 cups all-purpose flour (I replaced one cup of the all-purpose flour with whole-wheat flour because I was out of all-purpose and I liked it even better.)
1 tablespoon sugar
1 1/2 teaspoons salt
2 teaspoons bread machine yeast


Prepare dough for crust in the bread machine according to the maufacturer's instructions using the dough cycle. Divide into two pieces. Wrap one piece and freeze for later use.


Preheat the oven to 425 degrees with a pizza stone on the center rack for at least 20 to 30 minutes. I LOVE my pizza stone, it makes the crust so much crisper!


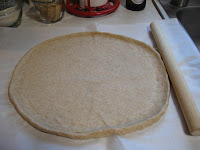
Roll dough into a 14-inch circle. If I had a pizza peel, I would dust it liberally with cornmeal and roll the dough out on that but I don't so I use parchment paper.


Add some sauce. I just use tomato sauce with a little dried oregano, dried basil and garlic powder added in.


Top with some shredded cheese. I used cheddar and goat cheese this time because I'm trying to use up the goat cheese! LOL!!


Next, add your meat. We like pepperoni and spicy sausage. :)


Now, pile on lots of veggies! I used red, yellow and green bell pepper and green onions.


Carefully slide the pizza off the pizza peel directly onto the pizza stone and bake for 12 to 15 minutes (5 to 8 minutes longer for a thick crust) until the underside of the crust is brown and crisp. Check the underside of the crust by lifting with a metal spatula to be sure it is browned enough. Since I use parchment paper, I just pick the whole thing up and place it directly onto the pizza stone. Pizza Hut's got nothin' on us!! But wait, our little town is too small even for Pizza Hut!! :)